Summer... on the coast

  • Blog
  • About
  • Contact

Building Smart: How To Save Money

February 21, 2022 by Summer Shemo in Home Design

Hiii! Are you building or planning to build soon? If so, buckle up because we are riding this crazy roller coaster together! šŸŽ¢ In case you don’t know, Matt and I are still DIY’ing interior upgrades to our coastal farmhouse (C.O. Oct 2019) and we are also mid-build on a cabin in the Smoky Mountains. Our Smoky Mountain project is our first time ever using a builder AND our first time dealing with a bank for the construction loan… WOWZA, we have really learned some things! 😜

I wanted to share our best compiled list of ways to save big šŸ’° on home building. These really apply anytime, but are especially helpful when prices are inflating. (BOLO for part 2 to this blog post, in which I will address how to save money on interiors and finishes āœŒšŸ¼)

During the planning and home design stages, there are several areas you can focus on to significantly cut cost during your build. Home building is very popular right now as interest rates have seen historic lows in recent years. However, building materials and labor costs have skyrocketed. With interest rates set to rise throughout 2022 (plus many speculating a housing bubble burst is in our future), there is a lot of uncertainty around building in the current market.

A quick backstory for why I’m so passionate about this: Back in 2006-7, I owner built my first home at the absolute peak of a housing bubble. Prices of everything were sky high. Most people I was listening to were forecasting that prices would continue to rise, but in the end of 2008 (just months after I closed on my first-ever home mortgage) the housing bubble burst and prices drastically declined. Thankfully for me, I was never upside down in my purchase, but had I not taken lots of steps to save money during my build, I could have been foreclosed like so many others in my neighborhood.

Here are 7 areas you can save BIG MONEY based on your home design:

  1. Total Square Footage (SF): Cutting down your home size is the easiest way to save money. Your home includes your heated/cooled SF and your garage/porches/deck/etc SF. Generally speaking, I am seeing average builder pricing of $2-300/SF across the US right now. Of course, there are some builders, some homes, and some regions that are above that range and a few that are lower (and fully custom is higher cost than semi custom). I have read that non-H/C SF cost to build ranges $60-80/SF (and that can really vary), but for rough estimate you can take your total desired H/C SF multiply by ($2-300) and add it to your ā€œotherā€ SF multiply by ($60-80) to see a total price range. With the volatility of material and labor costs, it’s always better to err high on your estimate. Shaving square footage down is the best way to ensure that your build stays within your budget and I recommend developing a floor plan that allows for additions down the road, if desired. When we were designing our home, we seriously considered having our garage separated from the main home by a breezeway and not building it until later to save cost. When we realized we had the budget, we went ahead and built it all at the same time, but we were seriously considering that sacrifice.

  2. Roofing: The two main roof types we are seeing right now are hipped and gabled. Hipped roofs are known for being more stable (they have four sides) and can withstand high winds much better than the alternative. They generally aren’t as steep and are the less expensive option to build. Gabled roofs have pitches and peaks and are distinguished by forming a triangle at the ends. Gabled roofs are usually larger in size, and more expensive to build due to the size and pitch. The steeper the pitch, the more expensive they are to build. (Higher ceilings in a home with gabled roof requires a steeper pitch, so keep that in mind). Simple roof lines are imperative for saving money as the more varied the roof lines and angles, the price will exponentially increase. Many folks who are building right now are saving money by decreasing their gabled roof pitch (in turn lowering their ceilings which also saves money) and minimizing roof lines to only one or two. So this is a great option to consider, as the savings can be very large.
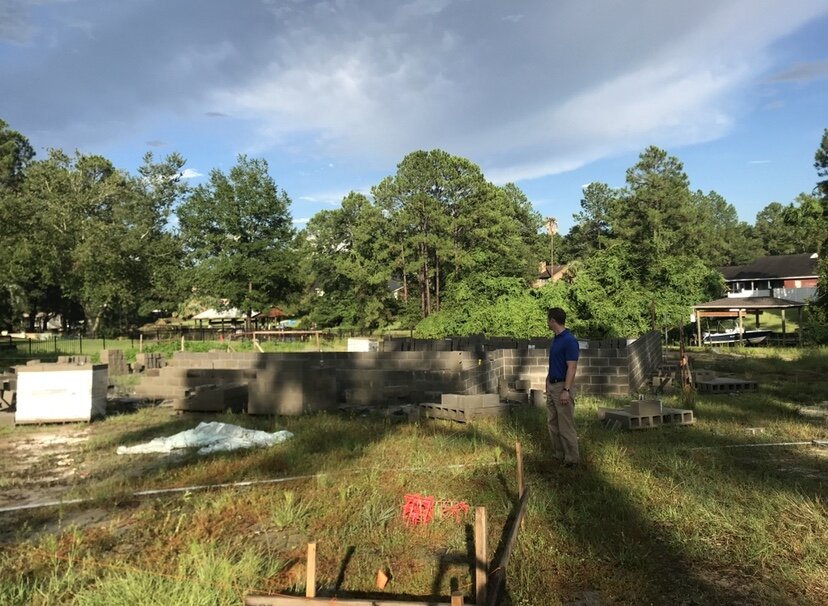
  3. Corners: As the saying goes ā€œmore corners = more money.ā€ The more corners you have in your exterior footprint, the more expensive your home build will be. A basic square or rectangle is the least expensive shape to build. Each bump out on your plan will be additional cost when you are constructing. I have stuck to simple rectangles with both of my previous home builds to save money, and we are also building a completely rectangle cabin right now, too. It really is just smart.

  4. Windows/Doors: Large windows usually cost more than small windows, custom sizing is significantly more than standard, and colored/painted is way more pricey than white. You can save thousands and thousands of dollars just by using standard sized white windows throughout your home. We did this with our coastal farmhouse and came in well below budget on our windows (even though we have something like 50 in this home!) The same idea goes for doors. Less doors, standard sizing, and standard materials are the most budget-friendly.

  5. Exterior materials: Have a plan for what you want to use on your exterior. Generally, Hardie board, brick, and stone are more pricey than stucco or vinyl siding. It’s also important to include your paint cost if you are planning to paint your siding or your brick, for example. When we were designing, we were really set on using Hardie products and so we priced the white colored boards vs buying primed and using an exterior painter. We ended up painting them after the fact because we found a good deal on primed boards and were able to find a reasonably priced painter.

  6. Garages/porches: If you are on a tight budget, my best recommendation is to scale down or completely cut out your porches and decks. (Remember, keep that footprint as square or rectangular as possible.) Stick to a two car garage (if you need one) and keep your porches minimal. Decks and outdoor living spaces can easily be added later.

  7. Driveways/landscaping: Keeping your driveway small and minimal saves money. It is usually something that you can expand later. We saved thousands by DIY’ing our landscaping. It is minimal and we add to it as we go. Fancy landscaping can cost tens of thousands of dollars and it’s very easy to save this money up front and add landscaping later down the road.

Also to note, additional roof lines, steeper roof pitches, more corners + bump outs all add to the visual interest and appeal of the home’s exterior. That is why many of your favorite home plans have these elements, but the truth is that each of these things adds significant cost to your construction.

I hope these tips are helpful for you! For most of us, our home is our biggest investment, so it really makes sense to invest WISELY. If you are building a starter home, I’d highly recommend scaling back in all seven of these areas. If you are planning to build your forever dream home, then you might have less adjustments you are willing to make, but you may have to adjust your budget. I am going to do a follow-up with tips on how to save money on your interiors as well!

Did I forget anything? Do you have any tips you’d like to add… or questions you’d like me to answer? Feel free to comment below, email me, or DM me :) Watch my video on my Instagram

Happy Home Building,

February 21, 2022 /Summer Shemo
home build, new home, custom home, custom build, save money
Home Design
Comment

Our Coastal Farmhouse kitchen

Cabinetry 101

January 30, 2022 by Summer Shemo in Coastal Farmhouse, Home Design

Our laundry cabinets

We don’t have many regrets about our Coastal Farmhouse build, but one of our biggest is our cabinetry. During the planning phase I asked around town for cabinet shop recommendations. I had one particular cabinet builder’s name come up multiple times and several acquaintances raved about his work. Even so, I went ahead and interviewed four different local shops before finalizing the decision. It was basically one high end, semi-custom cabinet maker, two semi-custom, high volume cabinet builders, and one fully custom cabinet builder (the one multiple folks had recommended). There was a $30k range in the pricing I received for our complete cabinet package. Two shops provided me with renderings, two didn’t (they just provided me a written description). The custom builder had given me penciled drawings and what I was so impressed with was that everything was symmetrical and there were no ā€œhalf cabinets.ā€ For some reason, I was pretty hung up on this idea of not wanting any ā€œhalf cabinets.ā€ He even was currently building another kitchen and he invited me to the shop to see the beautiful custom hood he was building for another client. He was a good salesman and we finally agreed on a price and due date and put down our deposit for fully custom cabinetry with fun details and symmetry throughout!

from pinterest

I’ll spare you all the dirty details, but due to Hurricane Michael complications and this man’s personal issues at home, he got months and months behind, holding up our construction. He was basically a one man shop and did not have near enough help for the jobs he was taking on. In the meantime, I was nauseous and dealing with first trimester 🤢 as I found out I was pregnant. Somewhere in that blur of a time, Matt called me and said that the cabinet builder wasn’t going to be able to provide us the custom hood in our contract and wanted me to pick one out of his catalog. (I was so sick that I still don’t have any recollection of this but Matt swears it happened. šŸ¤·šŸ¼ā€ā™€ļø) Months later when our cabinets were finally installed, I immediately called Matt and said, ā€œThis is NOT the hood we agreed on.ā€ Matt politely informed me that changes had been made when I was 🤮 and that there was no going back at this point (if we wanted to move forward and get into the house timely- and we had already moved 4 times in this process).

from pinterest

side note: we do have a long term plan to replace our hood with what we originally wanted, but that is another blog post. 🤪

Sadly, when the cabinet doors were later installed I had a real gut punch moment: this was NOT the cabinet style I wanted 😳🄺 I pulled out the contract and scanned it multiple times but it wasn’t written or specified anywhere 😩 I had never even thought to double check that we were getting inset-style cabinets, I just assumed it based upon his pencil sketching. šŸ˜• What we ended up with are partial overlay style (which is typically the lowest priced option). Full overlay is the mid-grade style and inset cabinets are the higher end of the cost spectrum. It was completely my mistake, and I’m writing this blog post in hopes of preventing anyone else from making it.

from pinterest

Here are my 9 tips to avoid Cabinet Regret:

  1. Verify in writing your cabinet style (inset, full overlay, partial overlay). Money tip- mix and match those for different rooms as a way to maximize your budget. For example, if you want inset cabinetry for the kitchen but can’t afford them throughout, maybe do full or partial overlay in your other spaces.

  2. Verify in writing your drawer type (Dovetail joints, or not- dovetail is usually the preferred type but may be an upgrade cost)

  3. Verify in writing whether you are upgrading to soft close or not- again, this is usually an additional cost

  4. There is absolutely nothing wrong with semi-custom cabinets and that is what the vast majority of new homes are using! Fully custom cabinetry is really not necessary; if you don’t like the way the cabinets are looking, ask your cabinet builder to change it up. There are tons of cabinet options available nowadays and you should be able to get the look you want from semi-custom. And, it’s a more affordable option.

  5. Verify in writing your paint and/or stain colors. I have read so many horror stories from people who are building or remodeling and they got ā€œpaint gradeā€ cabinets but they wanted to apply a stain and ended up having to paint them because their cabinet orders were not clear.

  6. Verify your cabinet shop’s prior work on their social media pages or website. If they can’t provide any photos of prior work, let that serve as a red flag. 🚩 The cabinet shop we used had plenty of great references, but I didn’t look at any of his prior work before signing that contract. Big no! Those prior customers were happy because they wanted a completely different level of work than I did.

  7. Verify all cabinet upgrades in writing. Drawer pull outs, lazy susans, spice racks, and you know, all those handy things you can add now. And keep in mind that some of these items can be added later which may save you some dough upfront.

  8. Remember that good paint and great hardware really go a long way in elevating the overall look of your space. Especially if you have a huge mishap like ours 😬

  9. don’t get super sick or pregnant while building- just kidding! It’ll be fine, everything is fine. šŸ˜†

Cabinetry is a huge investment into the overall aesthetic of your home and I genuinely hope this has been helpful information for you. Share this with your friends who are building, planning to build, or remodeling so they can hopefully avoid these mistakes, too. Let me know in comments/email/DM if you have any questions or any specific topic you’d like me to cover next. šŸ¤—šŸ¤— There’s so many details to cabinetry design that we could totally do a ā€œCabinetry 102ā€ if you want it!

Head to my Instagram @summer_onthecoast to see the original Reel- this platform doesn’t allow the music

thanks for being here and stay warm out there!

January 30, 2022 /Summer Shemo
cabinetry, cabinets, home building, new build, new home, custom build
Coastal Farmhouse, Home Design
Comment
IMG_4115.jpeg

Owner Building: How to Source Your Funding

August 25, 2020 by Summer Shemo in Coastal Farmhouse, Home Design

Hi! Thank you being here! Now that we’ve talked a little bit about owner building, you may be wondering how to secure the funds to build. And that is a GREAT question!

Every community, every state, and even family circumstances can vary, so there is no ā€œoneā€ answer for this. Personally, I have raised private funds to use for construction on both of my owner builds. But I know that not everyone will choose to use this method.

Bank Construction Loan

Adjustments.jpeg

This is definitely the most conventional route to take, although it will take some work to secure a construction loan if you don’t have a contractor. So you have a few options here. If you have a good rapport with a builder, you could potentially ask them (or pay them a consulting fee) to sign off on your owner build. Their license would be ā€˜on the line’ for the construction therefore some builders may not agree, or they may agree with conditions. The other option is to shop around until you find a bank or credit union that will give you a loan to owner build. It isn’t easy but it isn’t impossible! Banks will likely have a stringent list of requirements and there may be some additional hoops you have to jump through… but just remember how much equity you will have earned and money you will have saved by putting in this hard work. One side note to keep in mind is that banks sometimes will require you to start the build with your own cash before they cut the first check. And even after the build gets going, some banks will require you to front the cash during parts of the build before they will cut the next check and that may require you to have cash available for use. Contractors typically will cover these costs when you hire them, but if you are owner building, you are expected to have the funds to keep construction moving forward. Most banks limit the construction loan timeline to one year and then require the loan to be rolled into a mortgage.

Adjustments.jpeg

Personal Private Funds

We actually used a HELOC (Home Equity Line of Credit) for one build and a piecemeal plan with savings accounts, cash from a recent property sale, and we put a few items on credit for the other. My mom is a CPA+financial planner, so we had a professional on board to bounce financial decisions off of (which I definitely recommend). If you use private money, make sure that you have a bank or credit union refinance-into-mortgage plan already in place before you start the build. I have worked very well with a local credit union here in Panama City and I was very shocked when I called around how many banks and credit unions gave me incorrect information or flat out refused to refinance into a mortgage from construction using private funds. The key is to have a plan in place before you begin the process and stay in contact with the bank throughout the construction of your home.

Private Money Lenders

Adjustments.jpeg

This is an option that I really am not well versed on, but it’s something that is utilized in real estate dealings (usually investment purposes). The premise is that you are borrowing from people who are loaning the money because the interest rate that they charge you is more than they could make with their money just sitting in a savings account. In essence, you will be paying them to use their money for a certain amount of time. This money is not backed by a bank and there’s more risk involved for you and for the lender in this scenario. You could request a loan from these private money lenders but the downside is that the interest rate is usually substantially higher than a bank loan (but still probably a lot less than paying a contractor for your build).

Adjustments.jpeg

As far as financing goes, just always cover your bases when you are owner building! You are taking on the risk of the build, so best practice is to have 20% of your total cost in cash. Most homes go over budget by about 15% because so many things change once the process actually starts and you will also need that money in cash (because a good lender is going to cap your spending at your original agreement). So, to give an example in round numbers, if you have a $100k budget total for construction, you should start off with $20k of that in cash plus you should be prepared to spend another $15k cash in overages throughout the build.

During our recent coastal farmhouse build, category 5 Hurricane Michael came to town and TOTALLY changed our building costs and plans! We were scrambling at the end to do everything possible to get to Final Inspection. We wiped out so much of our savings account paying for cash items/upgrades at the beginning of the build and at the end we had to prioritize tasks and move in with some projects incomplete.

Adjustments.jpeg

Matt always gives a different and interesting perspective on building, so here is his take: If you can build in phases, that is the way to go. Anything that can wait until after the initial build will help you get to the certificate of occupancy faster and closer to your end budget goal. whether it be the garage, a wing on the house, a patio; try to build the house in phases if at all possible. It is a good idea to think ahead and plan for the final product regardless, that way your plumbing and electrical will still be where you need it, but you don’t have to have a fully completed dream home immediately. Building a house in phases is definitely not for everyone, but owner building can easily ā€œbuild inā€ 20-30% of inherent equity simply by not having to pay the general contracting price.

Adjustments.jpeg

As always, please email me (or DM me on Instagram @summer_onthecoast) if you have any feedback! I always love hearing about your build plans!

Happy Tuesday!

Adjustments.jpeg
August 25, 2020 /Summer Shemo
owner building, custom build, custom home, owner build, self build, new home, home build, home build process, building process
Coastal Farmhouse, Home Design
Comment

Powered by Squarespace